Love You Too Release – Simon Says Stamp

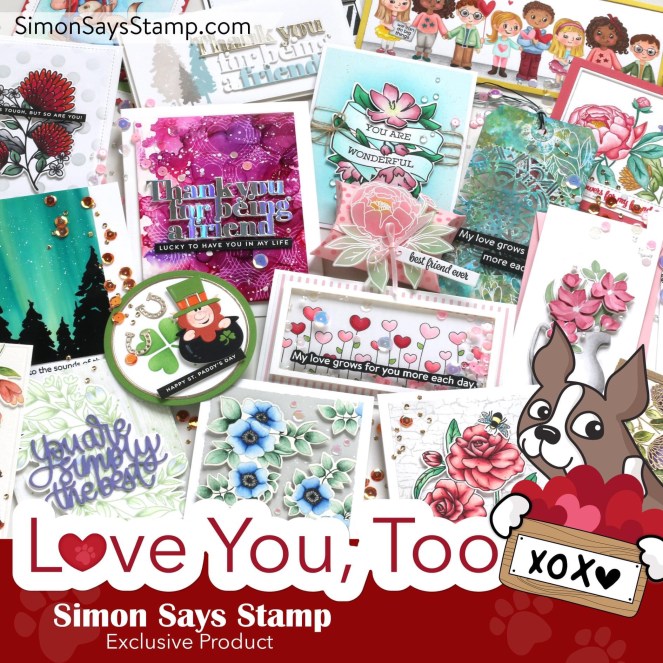
Hi Crafty Friends! I am so excited to stop in to share with you the beautiful new release from Simon Says Stamp – Love You Too! This release is gorgeous – truly something for everyone! You can check it out here.

I am super excited to share with you the beautiful new Sweet Friend stamp set! This set is just gorgeous! I love the floral images, the sentiments, and the adorable bumble bee! So let’s get started!

Stamping/Coloring

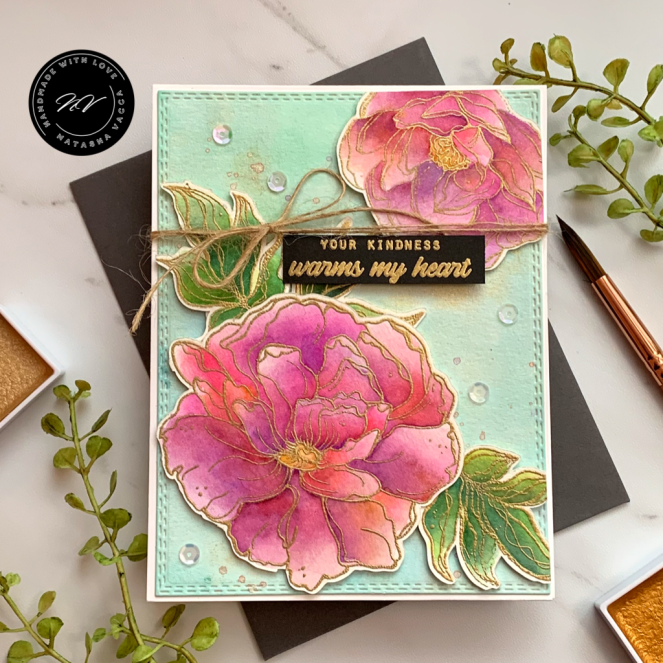
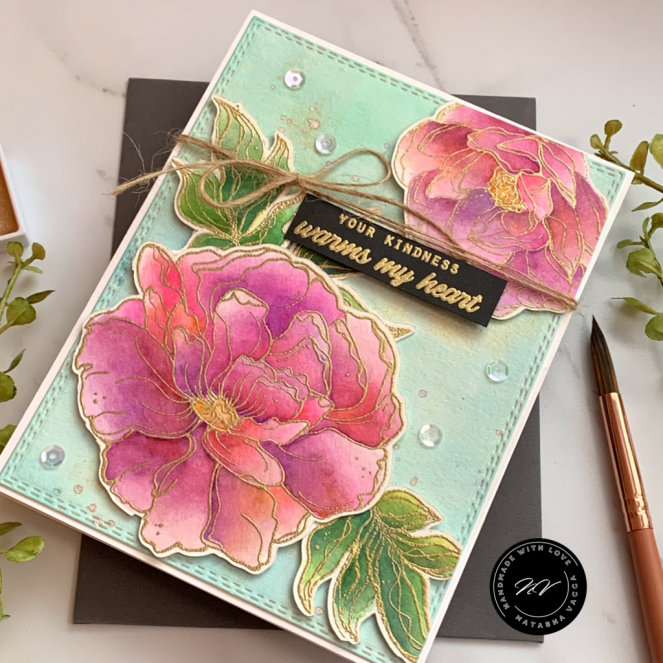
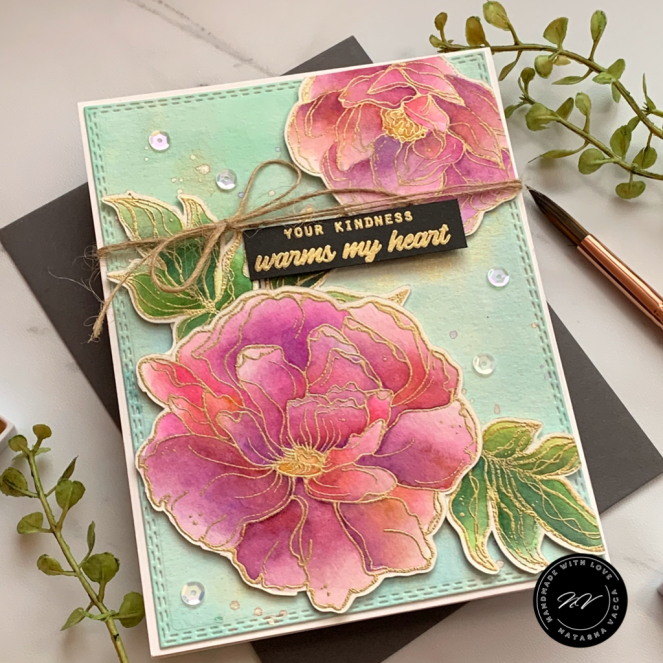
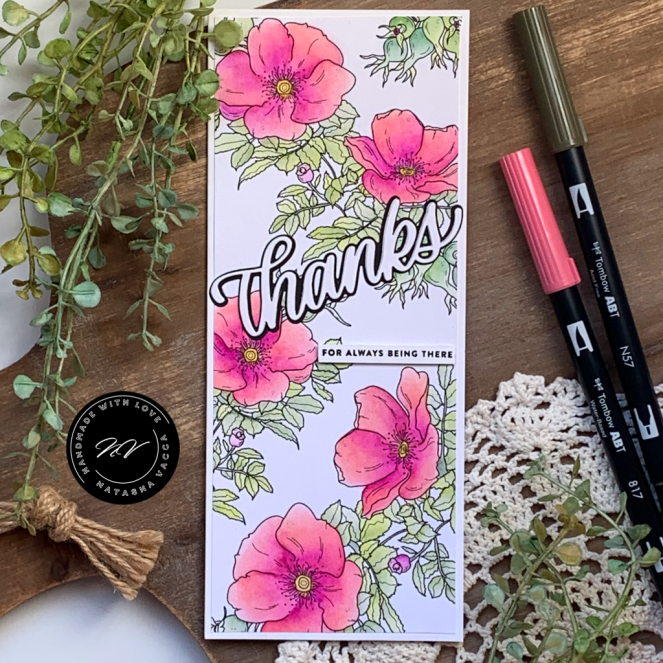
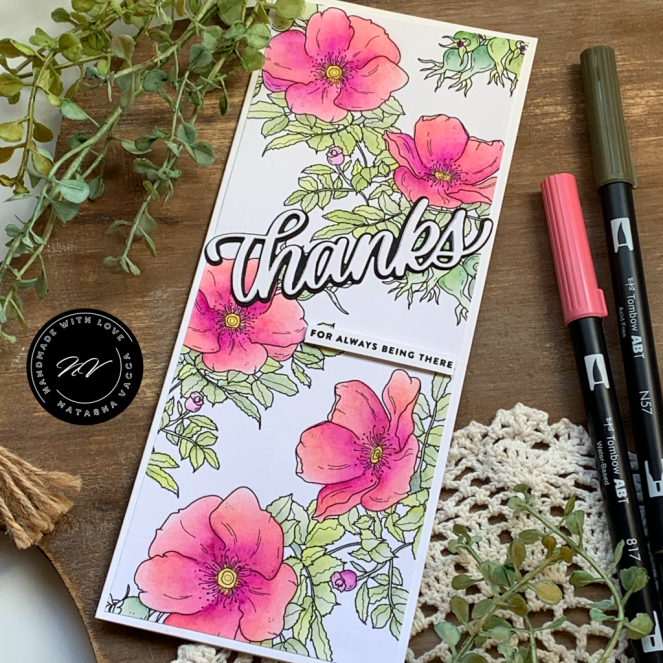
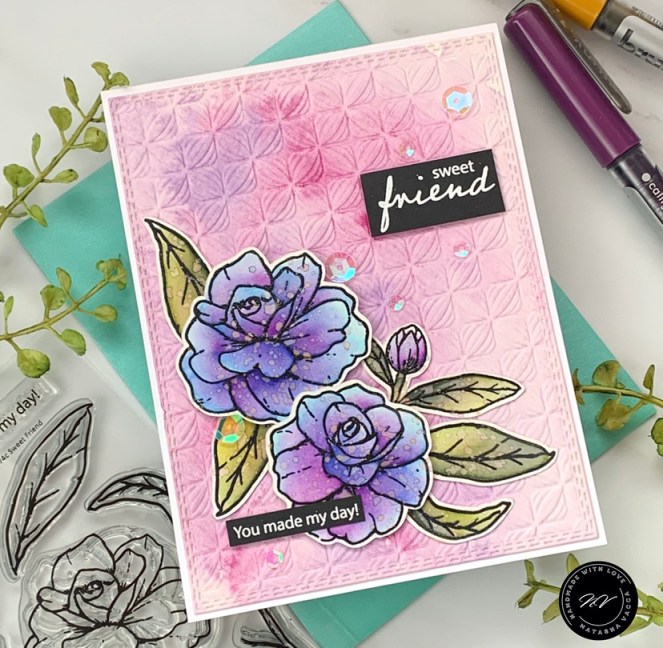
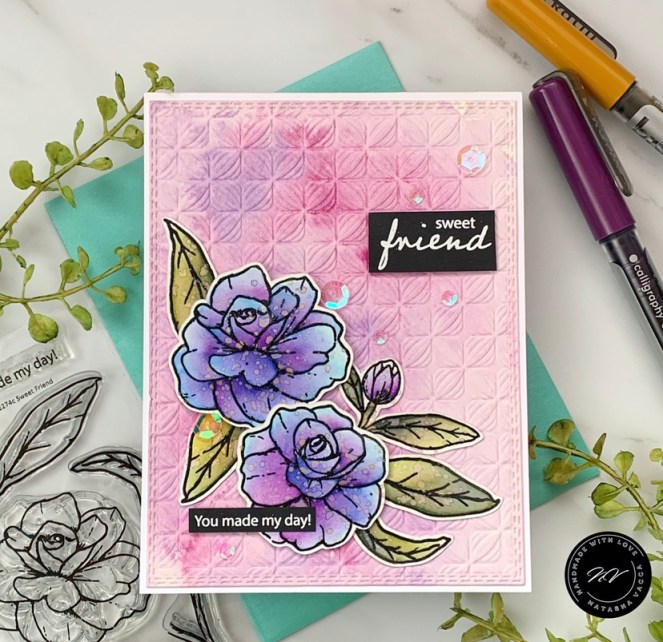
I started by stamping all of the floral images in the set on Fabriano Hot Pressed watercolor cardstock. I stamped the images using Versafine ink in black and I heat embossed them using a clear powder. When I started my card I wasn’t exactly sure of my layout yet, so I colored all of the images. For this card I used my Karin markers. I continued to work in layers and allowed them to dry in between. These floral images are so fun to color! Once everything was colored I set these aside to dry. Once they were dry, I used my Brother Scan and cut to “fussy cut” the images. It was time to get started on my background!

Background

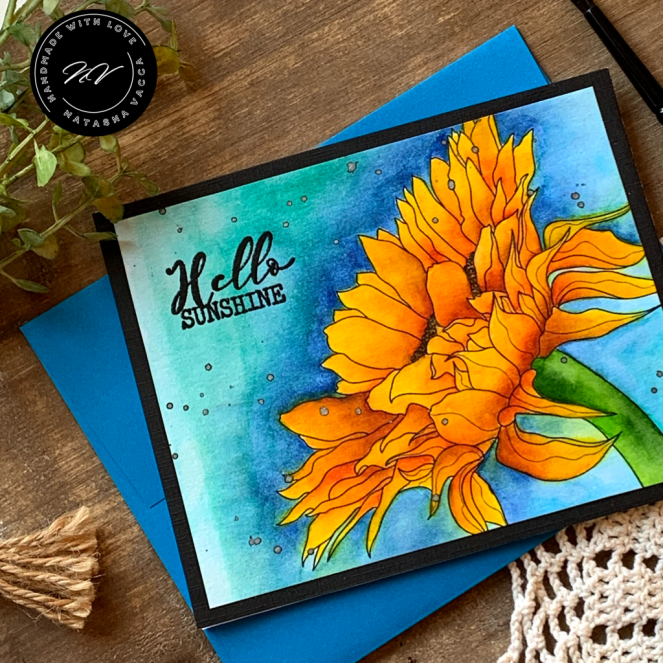
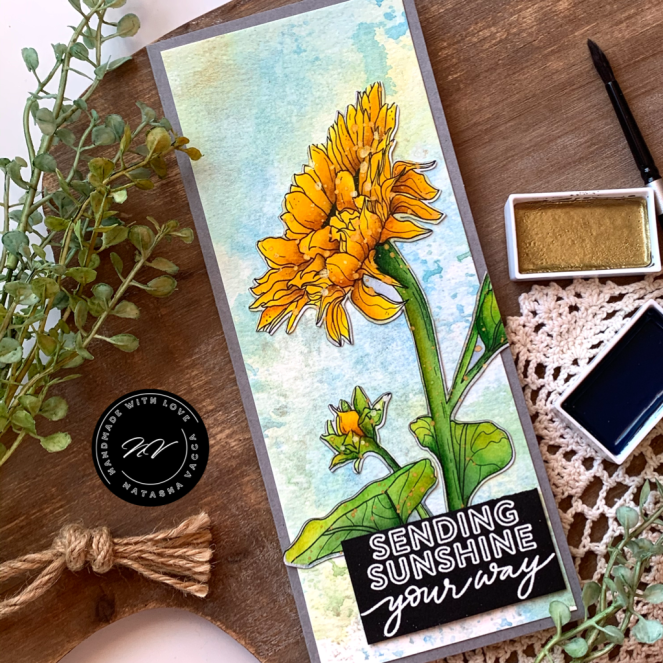
To create my background I used the gorgeous Lumen 3D embossing folder from the Holly Jolly release. I am loving the new 3D embossing folders Simon is creating! The details are gorgeous! On the Simon website you can find the “sandwhich” for your die cutting machine. I trimmed down a panel of white card stock and used my 3D folder in my Big Shot machine. I then used my Gansai Tambi watercolors to create the watercolor background. I placed several colors on my glass mat and added the colors to my 3D panel. I continued to add layers until I was happy with the colors. I wanted the background to be a soft pallet. I then trimmed down the panel (once it was dry) using a GMD rectangle die. I then set it aside.

Putting it Together/Sentiment

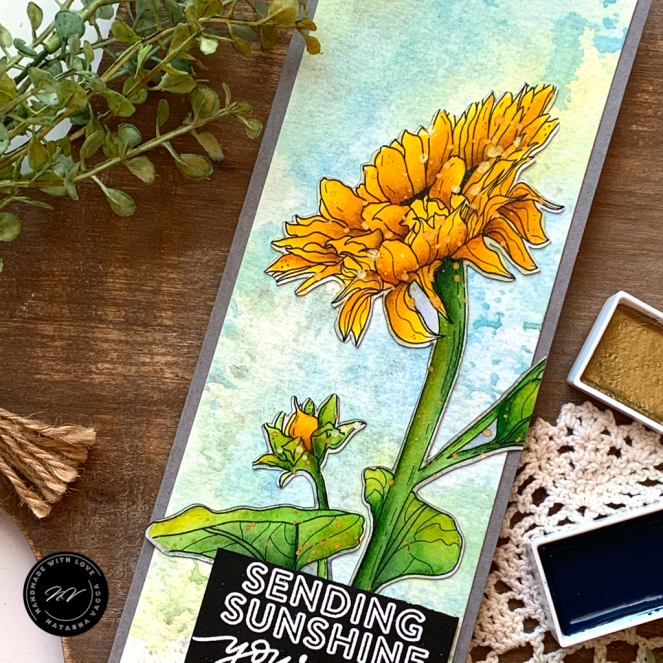
I chose 2 sentiments from the Sweet Friend stamp set. I stamped them using WOW embossing ink and then used a white embossing powder on black cardstock. I then adhered the 3D panel to a card base and started to decide on placement of the floral images. Once I chose the laytout, I did decide to add some splatter to the florals. Once that was complete I adhered everything with foam tape and added a few sequins!

I hope you like it! I am loving this AMAZING new release! Tell me what your favorite new product is.

Have a good day! Crafty Hugs,

Natasha

Watercolor – Sketched Peony

Hi Crafty friends! Do you love to watercolor? I wanted to stop in to share a watercolor card with you using the beautiful stamp set – Sketched Peony by Alex Syberia, for Marker Forte. I have linked to all of Alex’s stamps she has designed for Marker Forte. There are so many beautiful stamp sets she created, as well as stencils, and pattern paper!

Sketched Peony

Stamping/Coloring

I started by stamping 2 of the floral images from the set, as well as 3 of the leaves from the set on Canson Watercolor cardstock. I prepped the area first with my embossing buddy and then stamped the images using my Misti and clear embossing ink from WOW. When I use clear embossing ink I like to stamp the images at least 2x to ensure I get a good impression. I then used Gold embossing powder for my images and heat set them. Then I tapped them down onto my board so I was ready to watercolor.

For my card today on the floral and leaf images I used my Mijello Mission Gold watercolors. I just enjoyed the process of watercoloring and did a lot of color mixing. I love the openness of the floral images and just had fun! I let each layer of color dry on it’s own and then set these aside to dry completely. Once they were fully dry, I fussy cut each of the watercolored images using my Brother Scan and cut. It was time to now work on my background!

Background

To create the background I used an A2 sized panel of Canson watercolor cardstock. I taped this to my wood board again. I tape down my cardstock to prevent warping. On the background I used my Gansai Tambi watercolors. I used a mix of blues to create the watercolor wash and added 2 different golds as well! I love to create a watercolor background! The results are never the same and it creates a nice focal point for your card! Once the background was dry I used a combination of metallic watercolors (Arteza) to add splatter to the background. I chose a peach shade and a metallic purple. I wanted to add colors from the floral images to the background. Once it was dry, I trimmed down the panel using a Gina Marie Designs rectangle die!

Card Assembly/Sentiment

It was time to assemble my card once I chose the placement of my flowers and leaves. I glued one of the leaves down, then all other elements were adhered with foam tape. I have a small cup of sentiments on my desk and chose one from the cup for this card! I thought it added a nice final touch. I then add May Arts twine (another favorite) to create a bow and a few sequins as well.

Thank you for stopping by today! I hope I inspired you to create a watercolor card this week and/or a fun background!

Crafty Hugs,

Natasha

Watercolor with Sparkles – Unity Stamp Company

Hi everyone! I wanted to stop in today to share a card making technique with watercolor and sparkles! When I think of a winter scene I can see the snow glisten with added shine, it makes the cold and winter days so pretty! For today’s card I am using 2 stamp sets from Unity Stamp Company – October 2020 KOM and Love into Giving! Let’s get started!

I started by stamping the large tree scene stamp from the October 2020 KOM using Versafine Clair Ink – in Pinecone on Canson XL watercolor paper. I prepped my area for stamping using an antic-static powder tool. I stamped the image using Pinecone Versafine Clair. I stamped the image two times to ensure a dark and crisp image. I then added my first sparkle using Brutus Monroe Rainbow sparkle embossing powder. I love the subtle sparkle this embossing powder has, perfect for my winter scene. I followed the same process for the snowman from the Love into Giving stamp set. I love this cute snowman, he makes me smile!

I taped my stamped images to a board and enjoyed watercoloring with my Mission Gold watercolors. I started with my lightest colors and allowed them to dry, then added more color to add depth and dimension to both the trees and the sky. Once everything was watercolored, I set them aside to dry. I chose a sentiment from the October 2020 KOM and stamped this using Versafine Clair ink in Nocturne on a kraft cardstock. I then used my Tim Holtz distress tool to add a bit of a distressed edge to my sentiment strip.

Once my watercolor was completely dry, I wanted to add snow to the scene. To create the snow I used metallic watercolors in both white and silver. Once everything was dry, I fussy cut my snowman and assembled my card. I used a side folding card base, with a kraft card base. I popped up the sentiment using foam tape. I then added Stickles to the snowman’s hat and to parts of the tree as well for added shine and sparkles! I hope you enjoyed my watercolor scene with sparkles!

Thank you so much for stopping by today! I am so excited for this month over at Unity Stamp Company – we have so much more coming your way! It is an amazing time to shop – it is their biggest SALE of the year! No Coupon codes needed, just add items to your cart and watch the discounts appear – up to 55% off! I have listed all the products I used within my post. You can click on any of the links I have shared if you are interested in purchasing the products. The products listed are a compensated affiliate link, which means if you make a purchase I receive a small commission with no extra cost to you. I really appreciate your support.

Be sure to stop by to see all the items on SALE, including NEW stamp arrivals

Thank you for stopping by! I am truly thankful to have you stop over to my blog! It means so much to me!

Crafty Hugs,

Natasha

Alex Syberia Designs – June Release

Happy Friday everyone! I am super excited to be a part of Alex Syberia’s June release! I love Alex’s work as a card artist, as well as an artist of her own digital stamps! She truly inspires me as a card maker! Today I will be sharing 3 cards with you using her June release! You can see all of the release at her ETSY shop. Alex is also doing an Instagram hop with her guest designers this month, be sure to visit Alex’s Instagram page for an awesome hop full of her beautiful stamps, as well as tons of inspiration! Alex is giving away 5 – $10 gift certificates to her shop! Come join the fun!

For my first card I am using the Sunflower close up card panel. I LOVE SUNFLOWERS, so I was so excited to work on this card!

I started by printing the card panel on Canson Mixed Media paper. This image was ready to go as a card panel, so I was ready to being my watercoloring! I love making bright cards and I went with BOLD colors and a BOLD background on this one! I used peerless watercolors on the sunflower stamp, as well as the background around my sunflower. I worked in layers on this card and waited for the colors to dry, before adding in another layer of color. I continued this process until my sunflower was complete.

I then followed the same process for the background around the sunflower. I have to admit I did have a few spots that the watercolor ran… but in the end I’m liking all the color! I hope you do too! I stamped the sentiment – Hello Sunshine (Unity Stamp Company – Hello Sunshine Girl) in Versafine black ink and heat embossed it using a clear powder. I added a few black metallic watercolor splatters and mounted the panel on an A2 card base.

I am loving slim line cards – how about you? For my 2nd card I used the Dog Rose Ready Slime line card panel. I love that this panel was ready for me to create and add all the fun color!

I am using Canson Mixed media paper for my stamped image on this card as well. I used my Tombow Dual brush pens. I wanted to create a softer color palette on this card. Between each layer I let the panel dry, then added more color, until it was complete! I then die cut the Big Thanks die – Simon Says stamp. I die cut the black – thanks 1 time and the white 3 times, for added dimension. I then adhered these together and set this aside to dry under an acrylic block. I stamped the sentiment – For Always Being There from the same set (Big Thanks – Simon Says Stamp). I adhered the floral panel to a slim line card base and adhered both sentiments, the smaller strip is adhered with foam adhesive.

Here is a closer look….

For my last card – I used the Happy Sunflower Stamp. I did work with this image in word a bit, as I wanted to create a slim line card with this stamp as well. Once my image was ready, I printed this on Canson Mixed Media paper and watercolored this image using Peerless Watercolors.

I loved watercoloring this image! I followed a similar pattern as shared with the 2 cards above, giving time to dry between layers. Once my flower was done I set the panel aside to dry. I then started to work on my background the panel. I had so much fun with this… I used my Gansai Tambi watercolors to create the effect using yellow #43, blue #62, #63, gold #91, and White #906. I put all the colors on my glass mat with a little water and “smooshed” the paper on the glass mat. I then dried the background using my heat tool. I completed this process several times until I had the colors I was looking for. I love the added gold sparkle too! I placed the background under some heavy books for the night to “flatten” the panel.

I then used my Brother Scan and cut to “fussy” cut the sunflower. Then I added gold & white splatters to the sunflower. I may have added a few too many! Ooops! I also stamped the sentiment – Simon Says Stamp on black card stock using white embossing powder. Once everything was dry I put my card together and adhered the sentiment with foam tape for a little extra dimension.

I hope you enjoyed seeing 3 of the new June Release stamps from Alex Syberia! Be sure to visit her ETSY shop for the June release and more beautiful stamps!

Check out Alex’s BLOG for some amazing inspiration as well!

Don’t forget to join the Insta Hop – be sure to comment for a chance to win a gift certificate to her shop!

Have a great day everyone!

Crafty Hugs,

Natasha