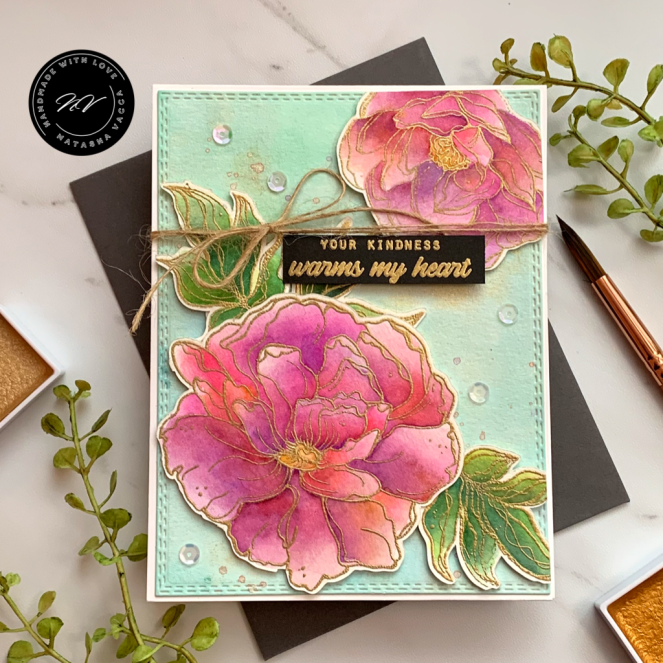
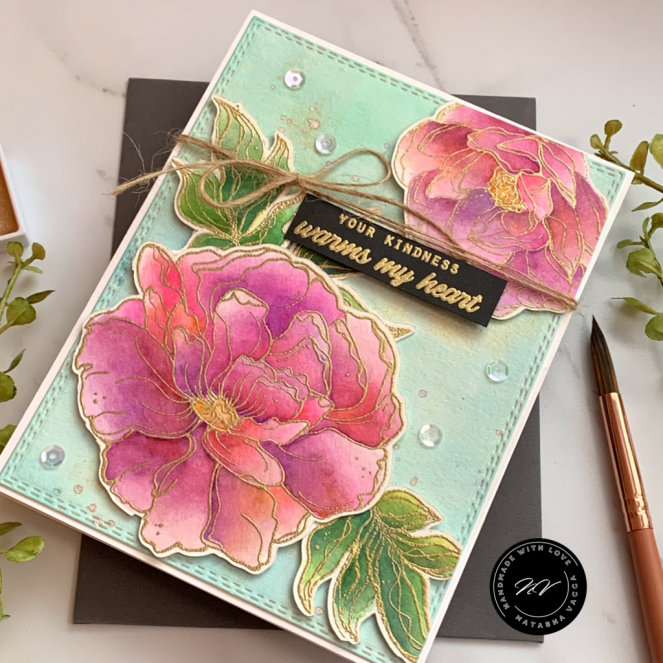
Hi Crafty friends! Do you love to watercolor? I wanted to stop in to share a watercolor card with you using the beautiful stamp set – Sketched Peony by Alex Syberia, for Marker Forte. I have linked to all of Alex’s stamps she has designed for Marker Forte. There are so many beautiful stamp sets she created, as well as stencils, and pattern paper!
Sketched Peony
Stamping/Coloring
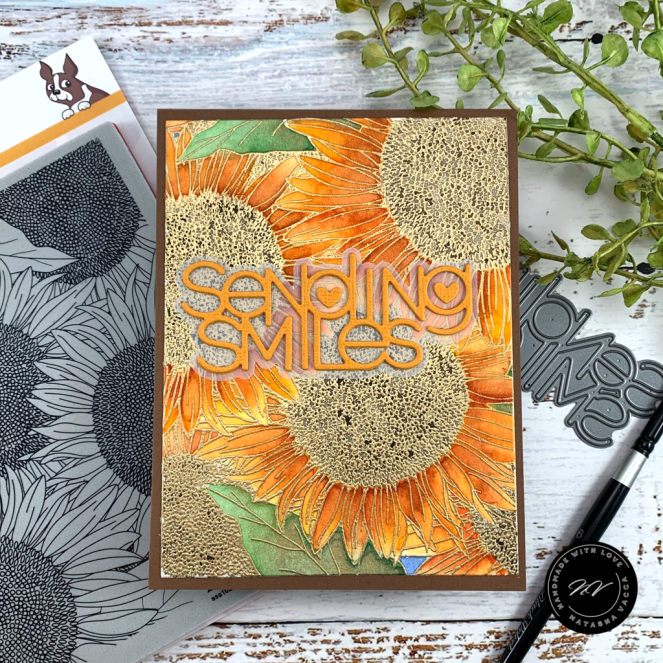
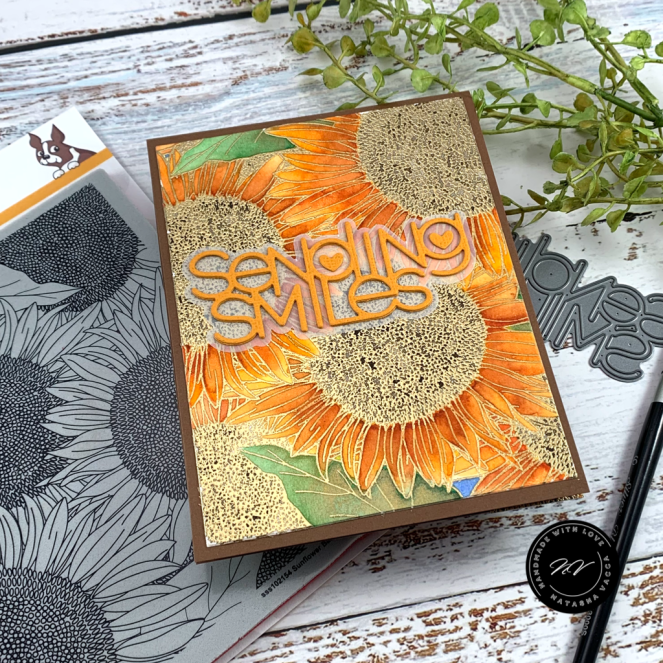
I started by stamping 2 of the floral images from the set, as well as 3 of the leaves from the set on Canson Watercolor cardstock. I prepped the area first with my embossing buddy and then stamped the images using my Misti and clear embossing ink from WOW. When I use clear embossing ink I like to stamp the images at least 2x to ensure I get a good impression. I then used Gold embossing powder for my images and heat set them. Then I tapped them down onto my board so I was ready to watercolor.
For my card today on the floral and leaf images I used my Mijello Mission Gold watercolors. I just enjoyed the process of watercoloring and did a lot of color mixing. I love the openness of the floral images and just had fun! I let each layer of color dry on it’s own and then set these aside to dry completely. Once they were fully dry, I fussy cut each of the watercolored images using my Brother Scan and cut. It was time to now work on my background!
Background
To create the background I used an A2 sized panel of Canson watercolor cardstock. I taped this to my wood board again. I tape down my cardstock to prevent warping. On the background I used my Gansai Tambi watercolors. I used a mix of blues to create the watercolor wash and added 2 different golds as well! I love to create a watercolor background! The results are never the same and it creates a nice focal point for your card! Once the background was dry I used a combination of metallic watercolors (Arteza) to add splatter to the background. I chose a peach shade and a metallic purple. I wanted to add colors from the floral images to the background. Once it was dry, I trimmed down the panel using a Gina Marie Designs rectangle die!
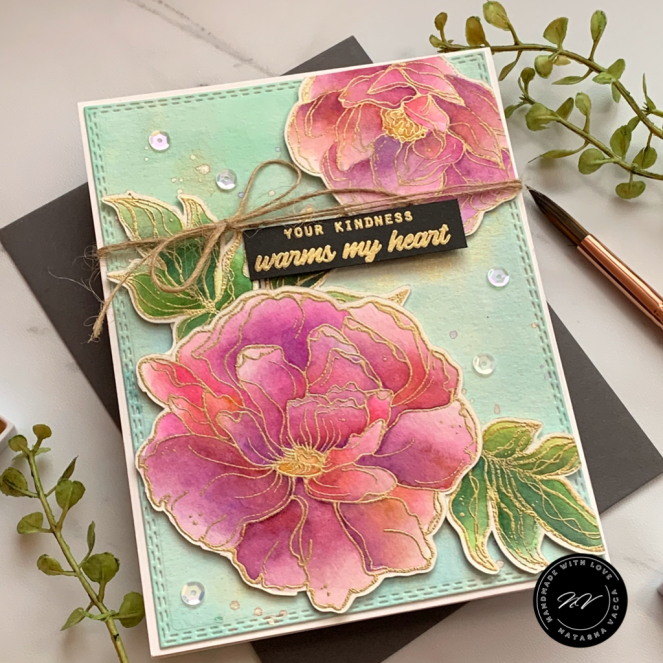
Card Assembly/Sentiment
It was time to assemble my card once I chose the placement of my flowers and leaves. I glued one of the leaves down, then all other elements were adhered with foam tape. I have a small cup of sentiments on my desk and chose one from the cup for this card! I thought it added a nice final touch. I then add May Arts twine (another favorite) to create a bow and a few sequins as well.
Thank you for stopping by today! I hope I inspired you to create a watercolor card this week and/or a fun background!
Crafty Hugs,
Natasha