NEW Release – Unity Stamp Company

Hi Friends! I am so excited to be back and share with you the AWESOME new release at Unity Stamp Company! This release has something for everyone and I couldn’t wait to share it with you! You can see all of the new stamp kits here. There are new backgrounds – 3 new ones is this release, adorable new gnome kits, new Graciellie Design including a stamp kit and pattern paper, as well as a gorgeous new floral sentiment kit! So let’s get started with the beautiful Hello Fresh Start January sentiment kit! This kit has 14 stamps!

Stamping and Coloring

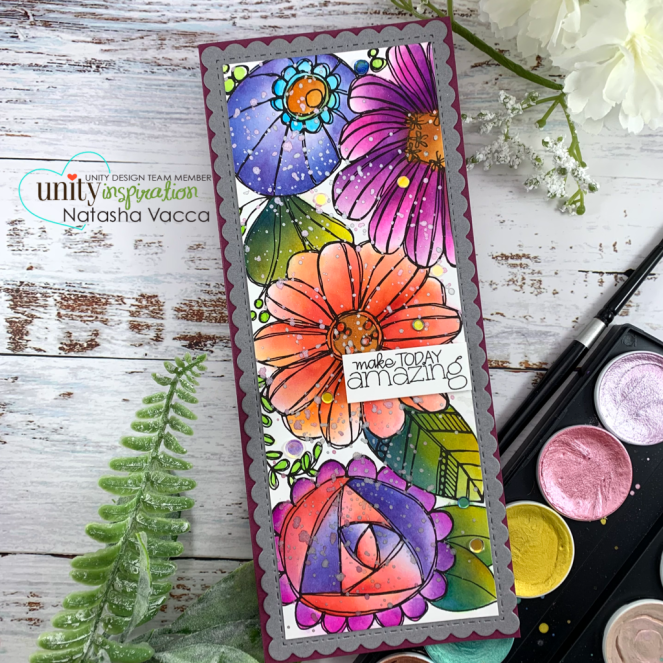
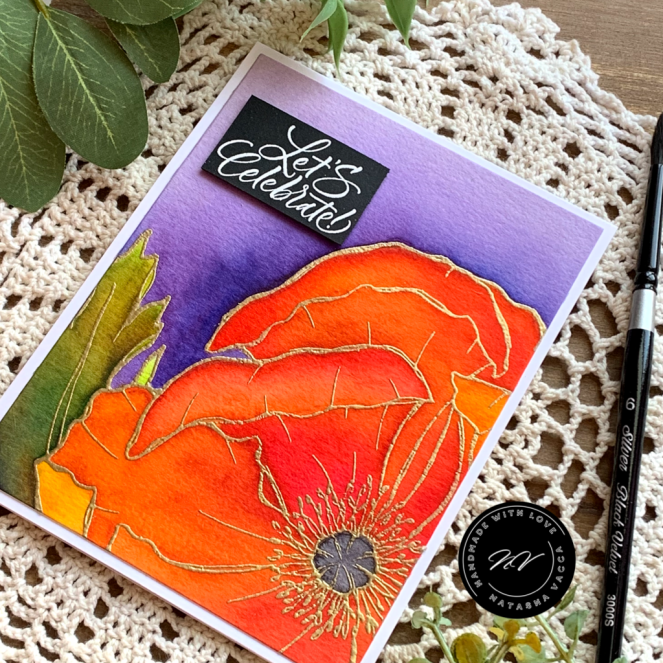
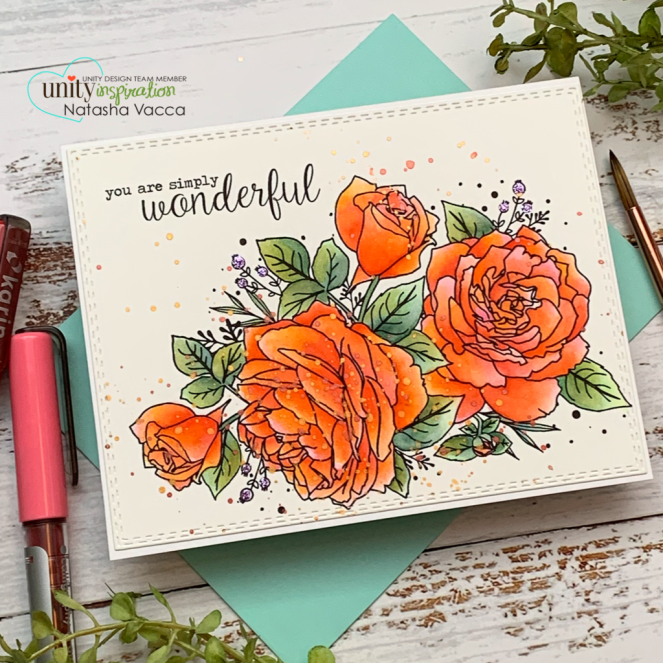
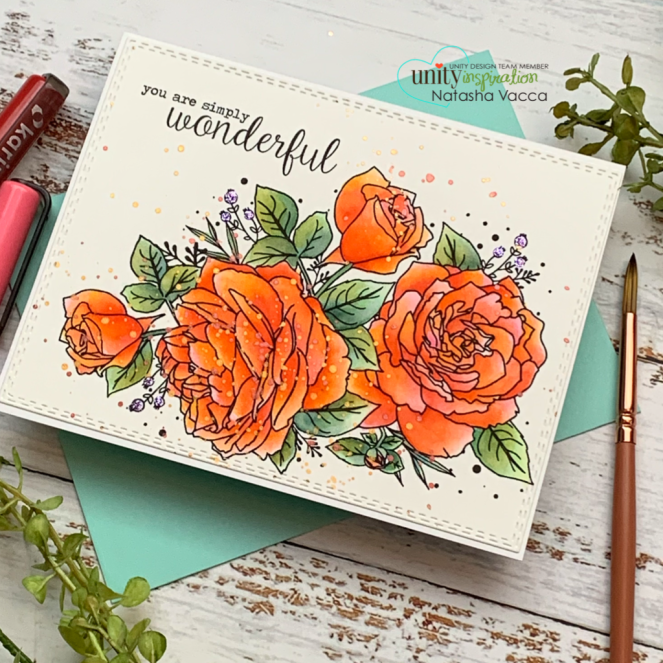
For my first card I wanted to create a one layer card. I love dimension, but thought this set was so pretty to stand alone! I started by stamping the large floral image from the Hello Fresh Start January sentiment kit on Fabriano Hot Press watercolor paper. I used my Karin markers to color this image. When I watercolor I enjoy mixing colors and adding layers to my cards! For this image, I initially had it in my mind to use soft colors, but then I got a bit carried away with adding colors, so I went with it! Has that happened to you? For this card I used the following colors: Pale Pink 220, Lipstick red 181, Gold 283, Orange Red 051, Apple 210, Curry 297, Olive Black 441, and Egyptian Blue 305. I added several layers of colors, always letting it dry in between.

Card Assembly/Sentiment

This set has AMAZING sentiments and the font is beautiful! I stamped the sentiment on my card panel using black ink. To complete the card I added splatters using Gansai Tambi Starry Colors, in #902 and Arteza metallic colors in Copper. I love adding splatters! I try to choose colors from within my images generally. I then die cut the image using a stitched rectangle die from Gina Marie Designs. I adhered my card panel to the card base. For a finishing touch I added Stickles to parts of the floral image in a purple color. I like how this compliments the orange floral image. I hope you enjoyed my first card!

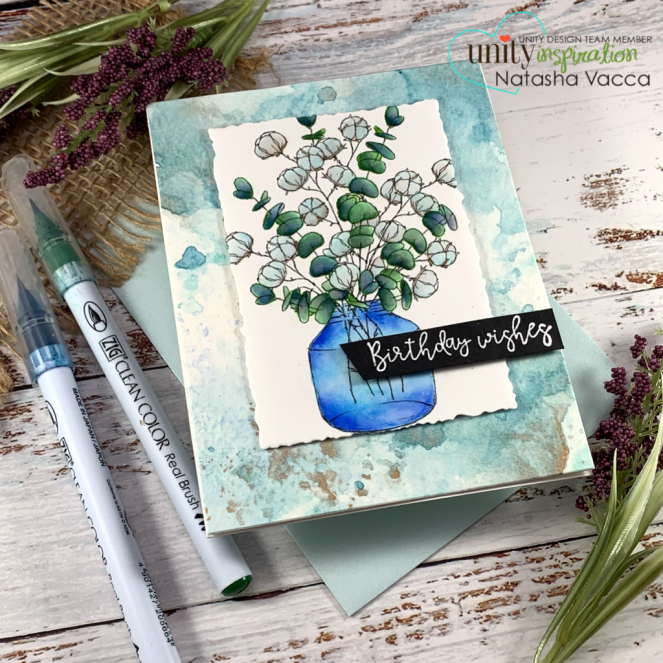
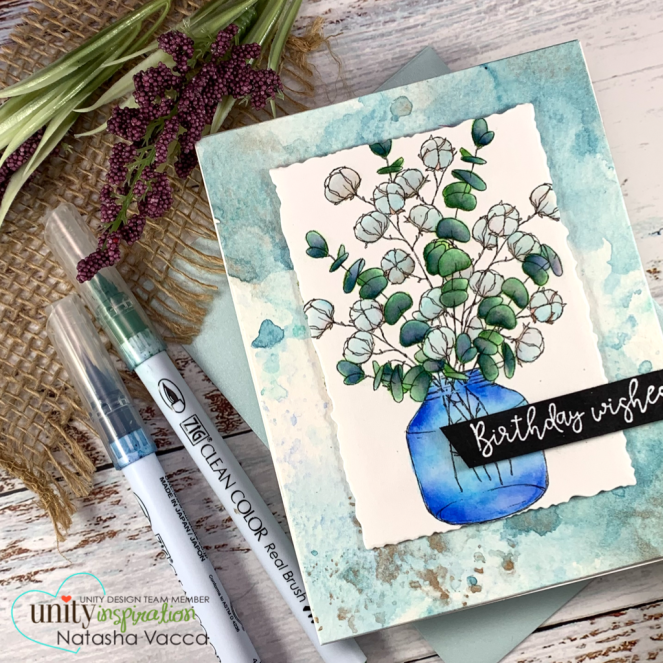
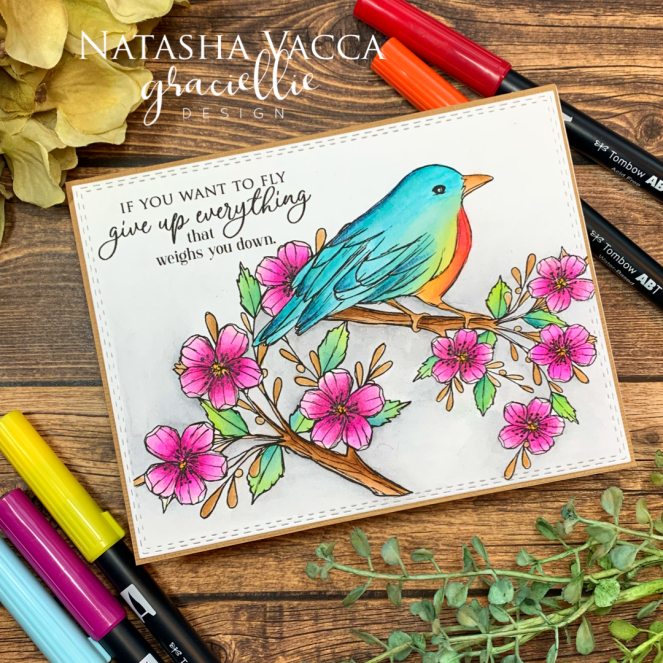
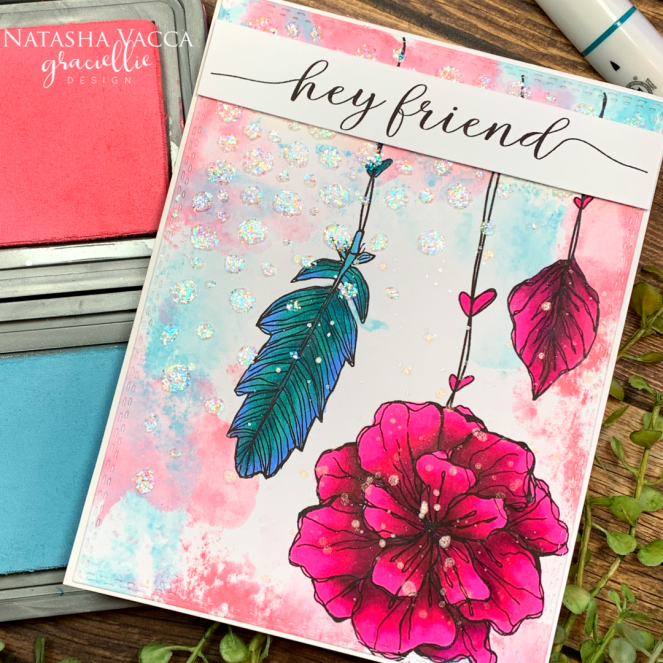
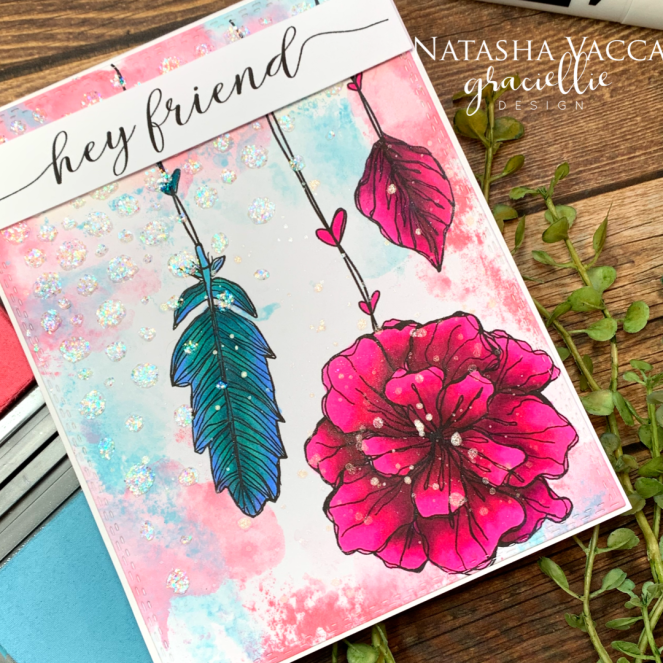
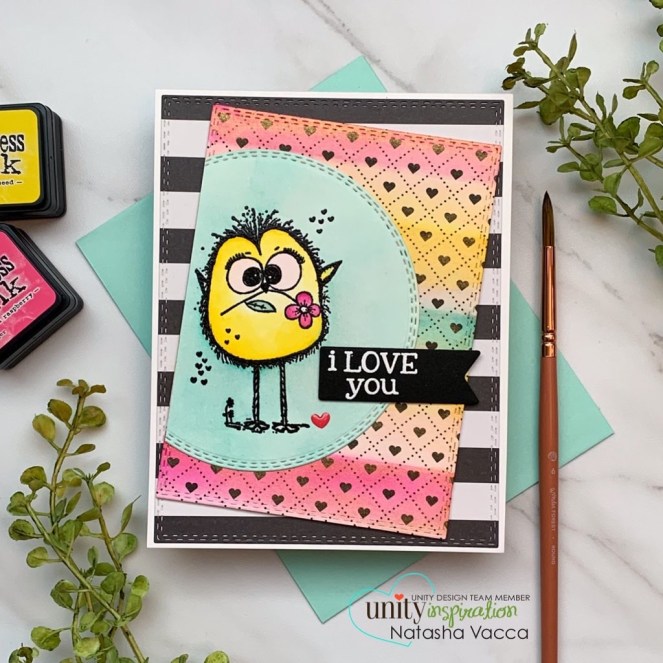
For my second card I am sharing the beautiful new Criss Cross Hearts background stamp! I love background stamps and this is a perfect addition in my craft room! Today I wanted to show you how I created a watercolor striped background using this new stamp! Let’s get started!

Stamping/Coloring

To begin this card I stamped the beautiful new Criss Cross Hearts background stamp using a black ink. I wanted to create a striped watercolor background. I taped the image to a board and used washi tape to create the stripes on my background panel. I wanted the stripes to be different dimensions so I didn’t measure, I laid the tape down. I then used my distress inks to create the watercolored background. I used Picked Raspberry, Mustard Seed, and Peacock Feathers. I started by laying down water on the section of the card panel and then applied the distress ink using a paintbrush. I followed the same pattern for the other sections. I originally left a few white stripes, but I wasn’t happy with this, so I added gold Gansai Tambi over the whole panel. I completed the whole process two times. I then set it aside to dry.

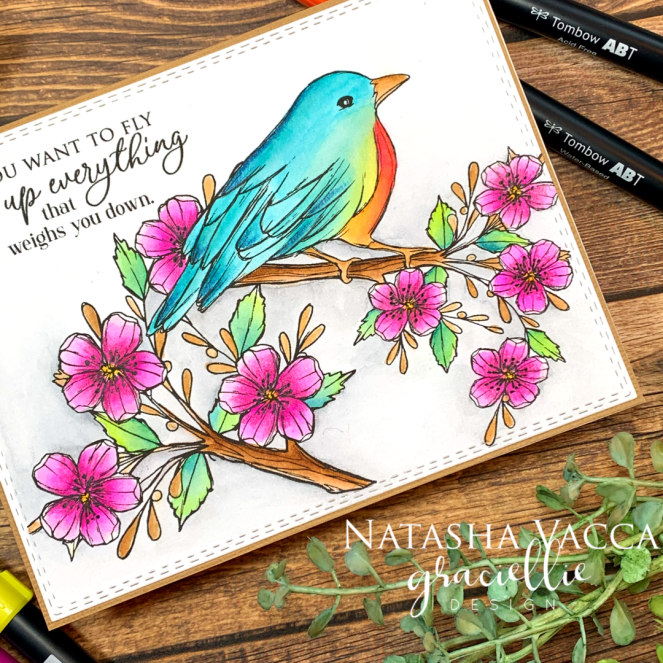
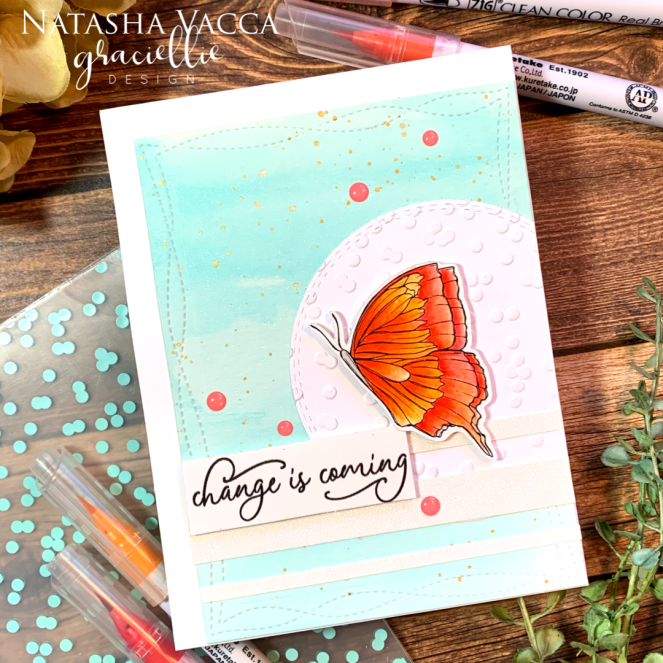
I then stamped the adorable bird from One Crazy Bird on Canson watercolor cardstock. I heat embossed the image using clear embossing ink. I completed a quick watercolor using the same colors of distress inks as shared above. I added watercolor around the bird image as well and set it aside to dry.

Putting It Together/Sentiment

While everything was drying I started to work on putting the final elements of this card together. I chose a piece of pattern paper from my stash and used a die from Gina Marie Designs. I trimmed down the stripped panel and adhered this to my card base. Using the same die I trimmed down the hearts background. I used a circle die with the same outer stitching to trim down the little birdie. I decided on placement of everything and adhered down the hearts and adorable birdie! I chose a sentiment from the One Crazy Bird kit and heat embossed this on black card stock. I trimmed it down using a die cut from my stash and popped it up with foam tape!

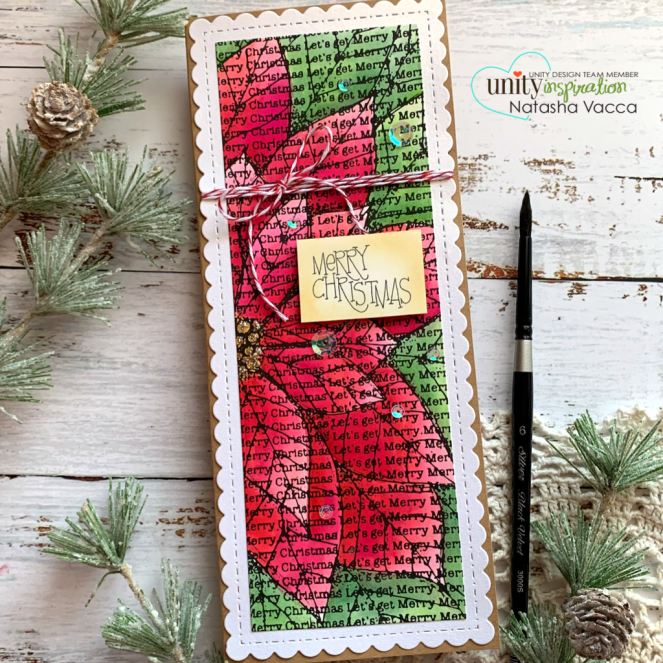
I created a 3rd card for this awesome new release! I will share a picture with you and links to the products used!

Happy Birthday Gnome

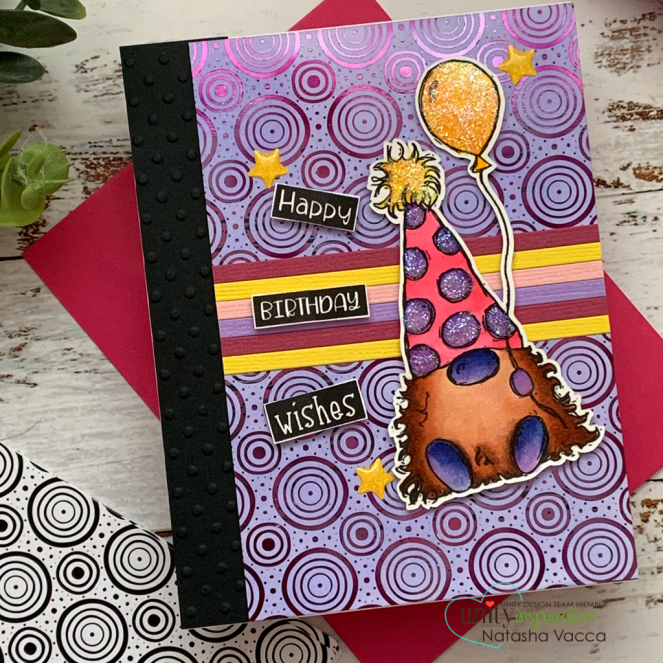
Here is a link to the products used on this fun Birthday Gnome kit!

Unity Stamp Company is kicking 2021 off with an AMAZING new release and a HUGE Sale! Check out the sale here! There are amazing stamp sets at $10, $12, and $14! WOW!

Additional SALE……

You can click on any of the links I have shared if you are interested in purchasing the products. The products listed are a compensated affiliate link, which means if you make a purchase I receive a small commission with no extra cost to you. I really appreciate your support.

Crafty Hugs,

Natasha

Simply Blessed – Unity Stamp Company

Hi Crafty friends! I hope you had a beautiful weekend! It was an awesome weekend here – the sun was shining, it was in the 70s, and my daughter came home from college for a family dinner! It was a GREAT weekend! I hope you had a nice weekend too! I wanted to stop in to share a card using one of the new released stamp sets from Unity stamp Company – Simply Blessed! I love this gorgeous new set by artist Graciellie Design. I love this gorgeous jar of blooms and the sentiments in this set! Graciellie has beautiful sentiments! I also wanted to stop in to share the AMAZING SALE that is happening over at Unity Stamp Company – it is their biggest SALE of the year! There are 10 new released stamp sets, an advent calendar, Unity Hoodies, and a discount on supplies! Be sure to head over and stock up now, add the item to your cart and watch the discounts appear! You will save 55% off on stamp sets! It is the best time to shop! Happy shopping!

It is an exciting month over at Unity stamp Company – I wanted to share a card using the new release Simply Blessed. I love this set by artist Graciellie Design.

I started by stamping the image onto Fabriano Hot Pressed watercolor paper. I love this paper for watercoloring – it is smooth and does well holding water! For today’s card I used my Zig Clean Color brush markers. I love the arrangement on this stamp. I just enjoyed the watercolor process for both the Eucalyptus and the Cotton Stems. I added several layers of color on these images and once it was complete I set is aside to dry.

I wanted to create a soft watercolor look for the my card, so I did the same for my background. I used a piece of Canson XL Watercolor card. I chose a few colors of Gansai Tambi watercolor to create the background. I used one of my favorite techniques to create the background – ink smooshing. I added the color to my glass mat with water and “smooshed” the paper on top of the ink. I completed this several times and then set it aside to dry. I love the natural look this gives!

To complete my card I trimmed down the panel to fit an A2 sized card and adhered this to my card base. I then die cut the floral jar using a Tim Holtz die. I chose a sentiment from the Aging Gorgeously sentiment kit. I heat embossed this on black card stock using white embossing powder. I love the sentiments in this kit – truly perfect for a birthday celebration! I used foam tape to adhere both the sentiment and the center die cut panel as well. I hope this card will bring cheer and happiness!

I am so excited to share 2 cards using two new SLIMLINE stamps at Unity Stamp Company! I just adore both of these new sets by artist Ann Corbiere-Scott. I am in love with these slimline stamps! They are perfect for a slimline card, as well as for creating an A2 card!

Here is an example using the new Funky Flowers. I used Peerless watercolors to complete the coloring on this card. Isn’t this stamp so much fun!

I am also loving the gorgeous new Let’s Get Merry slimline stamp! I love this large Poinsettia image – inside each section are tiny words – isn’t it just AMAZING!

Thank you so much for stopping by today! I am so excited for this month over at Unity Stamp Company – we have so much more coming your way! It is an amazing time to shop – it is their biggest SALE of the year! No Coupon codes needed, just add items to your cart and watch the discounts appear! I have listed all the products I used within my post. You can click on any of the links I have shared if you are interested in purchasing the products. The products listed are a compensated affiliate link, which means if you make a purchase I receive a small commission with no extra cost to you. I really appreciate your support.

Huge Site Wide SALE

Thank you for your support! I can’t wait to see your beautiful projects!

Crafty Hugs,

Natasha

Let’s Celebrate!

Hi Friends! I hope your week is off to a great start! I have been enjoying using some stamps more recently from my stash! Today I am using the beautiful Unusual Day Poppy – by artist Graciellie Design/Unity Stamp Company! I was excited to work with this image in red rubber, the floral is HUGE!!! So let’s get started!

I started by prepping my A2 watercolor panel/Canson XL water color card stock with my powder tool and heat embossed it using a gold embossing powder. I used my peerless water colors on this card. I truly love these colors, as they are super pigmented so they are fun to use. I used a wet on wet technique to color this beautiful bloom. On the flower I used a combination of yellow, orange, red, and pinks. On the leaves I used greens, blues, and yellows.

Once my watercoloring was complete I added the color around the large bloom, using 2 shades of purple. I did a similar color combination the other day and I loved it! It was fun to try it again. I trimmed my panel to an A2 card size and adhered this to my card base. I chose the Let’s Celebrate sentiment from the May 2020 Kit of the Month. I heat embossed this in white on black card stock and then foam mounted this to my card panel. I find watercoloring so relaxing and an area I want to learn more in.

I also wanted to let you know Unity Stamp Company has a Mystery Discount Summer SALE happening right now. The SALE will go until Thursday evening at midnight. You can add items to your cart and the SALE/discount will appear. Have fun checking it out!

Thank you for stopping by! I am listing all the products I have used below. You can click on any of the links I have shared if you are interested in purchasing the products. The products listed are a compensated affiliate link, which means if you make a purchase I receive a small commission with no extra cost to you. I really appreciate your support.

Supplies Used:

Have a great afternoon! Crafty Hugs,

Natasha

Happy Mother’s Day – Graciellie Design

Hi Everyone! I hope you had a good week! I am back sharing the newest release from Graciellie Design – Happy Mother’s Day! This set is beautiful, it has 2 beautiful floral images and 8 different sentiments included in this release!

I started by printing my image on Nennah solor 80 lb card stock. For my coloring today I used my alcohol markers. This is a coloring medium I want to work on for myself, so I thought this is the perfect set to do this. I used a variety of shades for each section of the image. Once my coloring was done I added a bit of color to the nooks and crannies as well. I then used my Brother Scan and cut to fussy cut the image. I then added WOW embossing powder to different sections of the floral image using Fairy Dust embossing powder. I love the added shine of this powder!

I then used an embossing folder from Jo Ann Fabrics to create the panel background for my card base. I foam mounted both my sentiment and floral cluster and my card was complete! I hope you will visit Graciellie Design shop to see the beautiful new release and more!

Have a great weekend and stay healthy!

Natasha

Hang in There – Graciellie Design

Hi everyone – it is release day at Graciellie Designs and today I am sharing the Hang in There digital stamp set. You can visit Graciellie Design shop to see the new release, as well as all the other beautiful sets!

I started by printing the wood board and sentiment on Canson Mixed Media paper. I found with the Mixed media paper I can color shortly after printing (the ink dries very quickly). I am enjoying that part! I colored my image in using my Arteza brush markers. On the floral image I added WOW embossing powder in Fairy Dust. I love all the glitter in this powder! I wanted to use my stash of patterned paper for this card. I created a layout for the back panel using a mix of papers. I also die cut a small heart using a heart die cut. I adhered my card together using the patterned papers and my stamps!

This completes my card for today! I can’t wait to see what you do with the new set – Hang in There!

Crafty Hugs,

Natasha

Do Not Worry – Graciellie Designs

Hi everyone… I hope you are doing well and are adjusting to all the changes that are happening around us. It is so different to be home everyday and not go anywhere unless I have to (grocery store). I am enjoying my time at home with my family, my card making hobby, and I even got into the garden today! I hope you are doing well and healthy! Today I am sharing a beautiful new release from Graciellie Designs… Do Not Worry. This set is beautiful, 2 beautiful images, as well as 7 inspirational sentiments. I hope you will check it out, as well as the sale on her page! Gracie is kindly offering a free gift with an order too! You can see it here, this set is free with a $10 purchase!

I started by printing my image on Canson Mixed Media paper. This is a light weight paper, I don’t use it too often, but I wanted to give it a try. When I use a water based marker on digital images I like to set my card panel aside for 24 hours to ensure it is dry and ready for me to color. This set was so fun to color. I used both images from this set and I layered the one floral branch behind the bird. I used my Tombow dual brush pens to color my images. I used several layers of color on each section.

Once my coloring was complete I did add some colored pencils to the nooks and crannies as well. I also used a black Sakura Micron pen to add more details to the stamen of the flowers. This paper is thin and I don’t use it too often. I did find using a light touch with my markers and my water brush, the color moved really well. I wanted to try it as the paper is thinner and so much easier to print on. I will use it again for sure! I set the panel aside under heavy books for the night to flatten out. Then I cut the panel with a Gina Marie designs die. I adhered the panel to a kraft card panel, then adhered it to my card base. This card was all about the coloring, all one layer. I hope you enjoy it and be sure to check out the new release at Graciellie Designs. Be sure to visit her website as well, so many amazing and beautiful stamps on sale!

Enjoy your evening friends! Crafty Hugs,

Natasha

Kindness for Florals Instagram Hop – Graciellie Designs

Goodmorning my crafty friends! I hope you are doing well! Today I am sharing a beautiful stamp from Graciellie Designs – Hey Friend. I love this set and it is currently on sale! Today I am teaming up with some of my crafty friends on Instagram for an IG hop. I hope you will visit my instagram page to join our hop – you will be insprired by beautiful cards. Our theme for our hope is Floral Kindness – we all used a floral set, along with ink blending and stencils! It was so fun to see how beautiful and different they all are! Join in our hop and win prizes along the way!

I started by printing my images on Neenah 80lb card stock. I decided to experiement with ink smooshing using distress oxides and it worked! I used tumbled glass and worn lipstick. I then set my panel aside to dry overnight under some books. The next day I colored my images using my arteza everblend markers. I am excited to begin to use these more and learn new ways to blend! I love the bold colors!

Wen my coloring was complete I added a litle colored pencils for additional dimension in my coloring. I always get excited when I get to this part, I feel it all comes together! I then used a stencil from my stash and used glitter glaze from Brutus Monroe – Fallen Snow. This glaze is currently sold out, but it is so pretty! I love how much sparkle is in this glaze! Once the glaze dried, I added a few splatters usng Tattered Angels GlimmerMist. I then adhered my card panel to the card base and used foam tape to adhere my sentiment. Look how pretty this font is too…..

I hope you enjoyed this card and be sure to visit my instrgram account for our hop! You have until April 10th to enter the giveaway! Come join the fun!

Supplies Used:

  • Stamps: Hey Friend
  • Paper- Neenah 80lb cardstock
  • Coloring Medium Arteza Everblend markers, Arteza colored pencils
  • Other – Gitter Glaze

Have a good day! Crafty Hugs,

Natasha

Change is Coming x3 – Graciellie Design

Hi everyone! I hope you are doing well and finding ways to relax and create as well! Today I am stopping in to share 3 cards with you! A good crafty friend of mine Deborah @rightbrainart (check her out on Instagram) recently posted a challenge… you choose a stamp set from your stash and create 3 cards with that set. How fun is this…. and she has prizes for the top 3 entries! You have until April 18th to post! Just be sure to tag #3xcardchallenge over on Instagram! Can’t wait to see what you make! I am also joining in on the fun… today I am sharing 3 cards using the new release from Graciellie Design – Change is Coming. Be sure to check this set out – it is BEAUTIFUL! I will share a brief description of each card, reach out to me if you have more questions!

For my first card I used the single butterfly from this stamp set. I was inspired by an image I found on the internet after searching bright colorful butterflies. I colored the image using my zig clean color brush markers. I added pearl gold sparkle embossing powder from WOW to sections of the wings. To create the polka dots on the black section of the wings I used a white gel pen. I used foam adhesive to adhere the sentiment and die cut the panel using a Gina Marie designs die. I used Nuvo Crystal Drops – in Ebony. I used a black piece of card stock on my A2 sized card for the background and adhered it all together.

For my second card I used the half butterfly again. I colored the stamped image using my zig clean color brush markers. I also added sparkles to the butterfly using a sparkle pen. I used a background I had previously created from my stash. I then die cut a circle and used an embossing folder (Jo Ann Fabrics) to add more dimension to my die cut circle. I used glitter paper to create the 3 strips across the bottom section of my card. I chose the sentiment Change is Coming. I added some drops in pink (older Stampin Up Kit), adhered it all together, and my card was complete.

In the above image you will see my 3rd card I created using the Change is Coming set. You can find more details on my previous post from March 20. I hope you enjoyed seeing 3 different ways to use this beautiful stamp set from Graciellie Designs. I encourage you to join in on the fun and create 3 cards using a stamp set of your choice! If you would like to join my design team friend Sandhya and I from Sanjus Creations , we also host a collab each month using a Graciellie Designs stamp set and we are using the Change is Coming set this month! Come join the fun! On Instagram be sure to tag us #gracielliedesigncollab

Wishing you a Happy Sunday and a healthy week! Hugs,

Natasha