A quick way to add color…

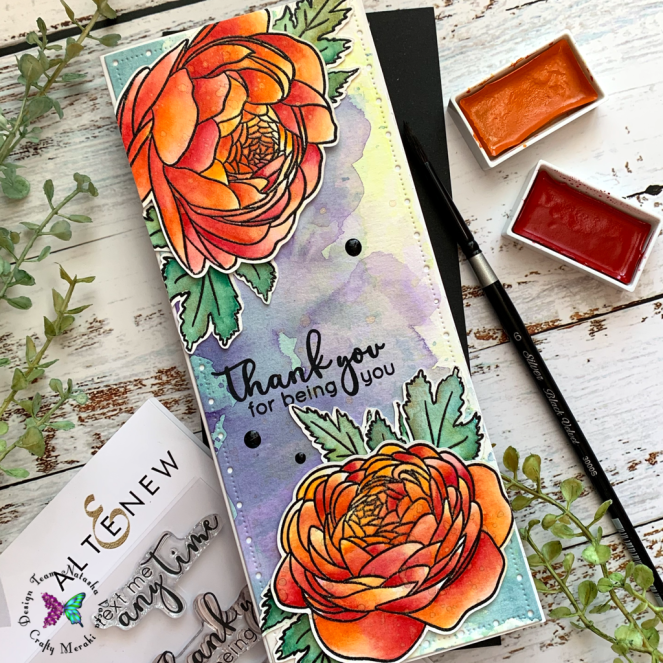
Hi everyone! I hope you had a great week! I can’t believe August is winding down! I have been busy getting my daughter ready for college, and as a family our school year starts in just a couple of weeks! Today I am guest designing over at Crafty Meraki.

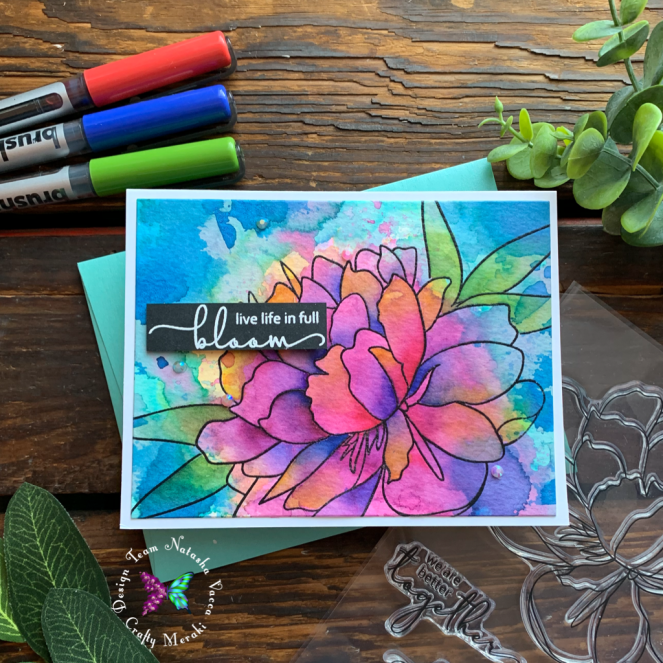
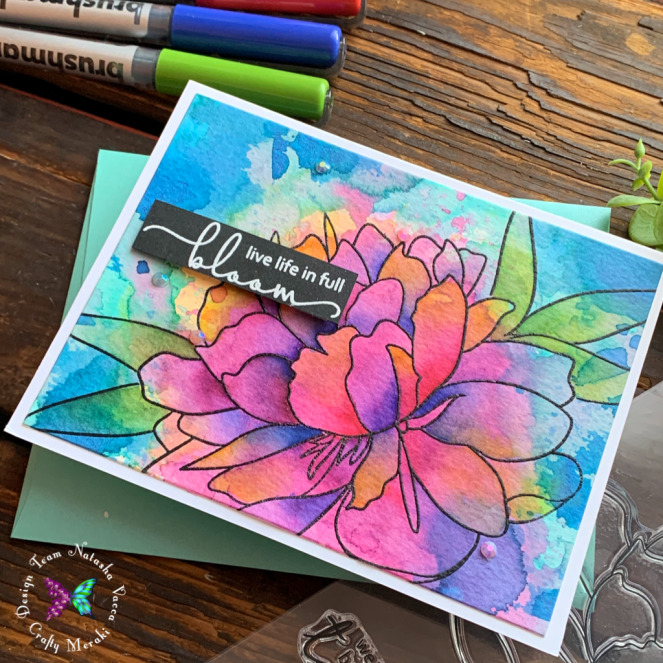
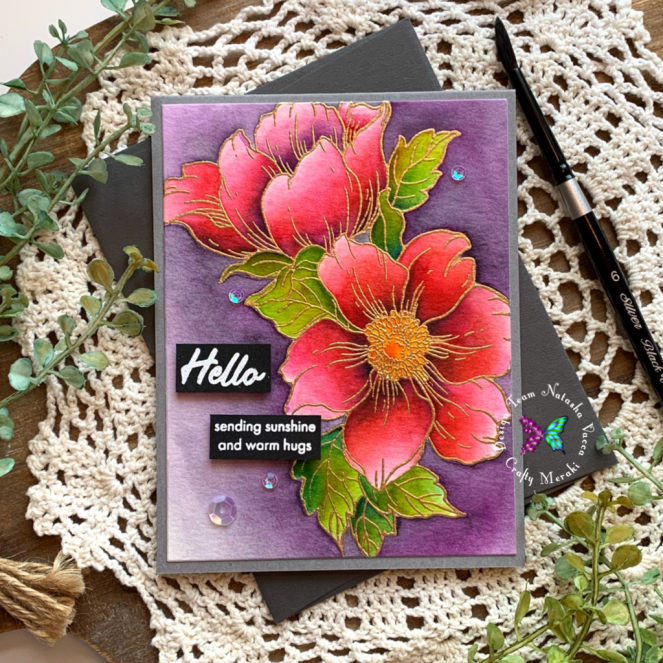
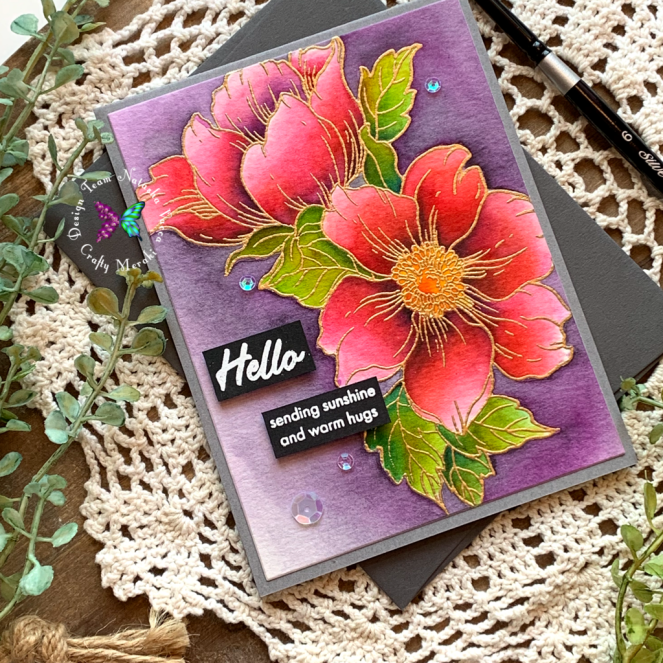
Do you love to color? I know I do! Today I wanted to share with you a different way to add color to a floral image that is quick and simple. I also think it gives beautiful results when you are pressed for time. I was inspired by this design by 2 of my talented crafty friends Alex Syberia and Colleen Balija. I have linked their Instagram accounts as well (just click their names). Colleen also has a quick video on her feed if you want to see this technique in action! Thank you to my sweet friends for sharing your ideas! I am using the beautiful Hero Arts & Altenew collaboration set, Bloom and Grow.

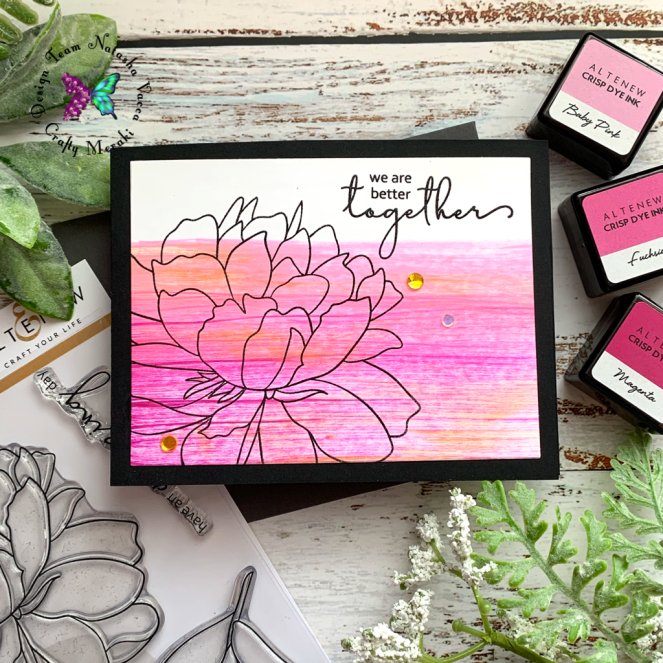
To begin I stamped the image on Neenah 80 pound solar white card stock. I used Versafine ink in black and heat embossed the image using clear embossing powder. I then used three ink cubes from Altenew. I used Baby Pink, Fuchsia, and Magenta. To add the color I simply started with the lightest color by placing the ink pad directly on the paper. I started on the left side of the floral image and gently swiped the ink pad across my card stock panel. I then moved to the medium color Fuchsia and did the same thing. Last I added the deepest of the pinks, Magenta following the same pattern. I then added a bit of gold pigment ink by gently swiping the ink pad across the panel as well.

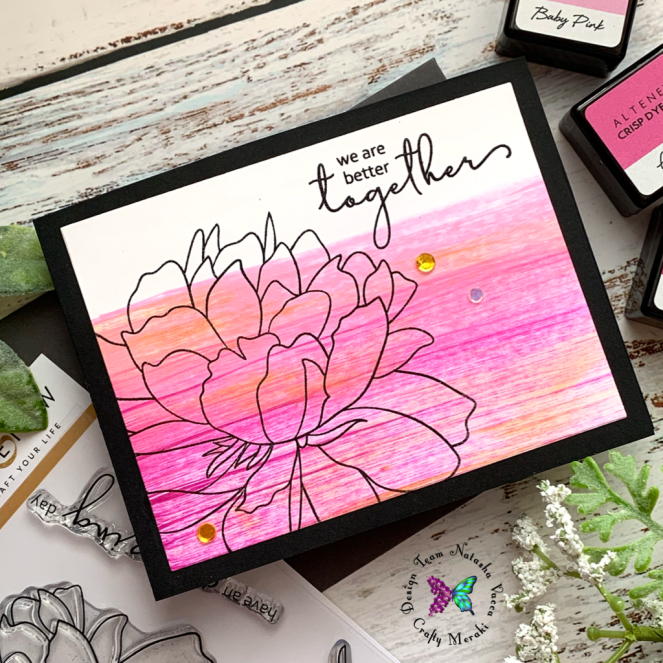
I then chose the sentiment from the stamp set and placed it in the top right corner using Versafine black ink. I die cut the panel and adhered it to my black card base. I added a few gold sequins to pull out the gold ink in the background. I truly love to color floral stamps! I was excited to try something different today! I hope you enjoyed it!

Crafty Hugs,

Natasha

Watercoloring and Ink Smooshing

Happy Friday everyone! I hope you had a great week! Today I am Guest Designing over at the Crafty Meraki blog! Today I am using the beautiful Sweet Nothings set from Altenew. It is a beautiful stamp set! Let’s get started!

For today’s card I chose to work with my Gansai Tambi watercolors. Any water coloring medium you own will be great to use! I started by stamping the 2 large floral images and several of each leaf on Canson Watercolor paper. I stamped the images in Versamark ink and then heat embossed the images using clear embossing powder. Today I am using the wet on wet technique for my watercoloring. I made sure to tape down my paper to a board to help prevent warping. When watercoloring I work in layers and let each layer dry. I find with watercoloring, letting it dry on it’s own gives me the best results. The colors I used are:

  • Leaves: Turquoise Blue 62, Viridian 55, Forest Green 56, Yellow Ochre 44, Blush Gold 91
  • Flower: Cadium Orange 33, Carmine 35

Once my watercoloring was complete I set these aside to dry. I then wanted to create a watercolor background. Which is truly one of my favorite ways to make a background! I placed several colors on my glass mat and sprayed with water and then “smooshed” my paper onto the glass mat. I completed these several times and then set it aside to dry. The colors I used are:

  • Lemon Yellow 40, Imperial Violet 38, Indigo 67, Gold 90

I then fussy cut my images using my Scan and Cut. I trimmed down my watercolor panel using a slimline die. I love the sentiments in this set. I stamped the sentiment using Versafine Ink directly on my card panel. I adhered my card together. To complete my card I added some gold perfect pearls splatters and Nuvo drops.

Supplies Used:

Thank you so much for stopping by today! Have a great day!

Crafty Hugs,

Natasha

Bold and Bright Ink Smooshing Florals

Happy Friday everyone! It has been a beautiful week here, lots of sunshine, gardening time, family boating, as well as crafting time! Today I am guest designing at Crafty Meraki. I was so excited to use the beautiful collaboration set from Hero Arts and Altenew – Bloom and Grow! This stamp is beautiful! Today I wanted to create a bold and colorful card using ink smooshing and markers! Let’s get started!

I started with a piece of Strathmore watercolor paper. To create the background I used an ink smooshing technique using a piece of acetate. I brought out my Stampin Up ink pads in the following colors: Pink Passion, Bermuda Bay, Rich Razzleberry, Blue Bayou, Brilliant Blue, and Summer Sun. One at a time I smooshed the ink pad on my glass mat, added water, and picked up the color using acetate. Then I placed the piece of acetate in different sections of the panel and layered the colors. I completed this several times and dried the panel between layers with my heat tool. The last layer I let that air dry.

Once my panel was dry I used the large bloom in the stamp set. I prepped the area using my embossing buddy and then stamped the bloom using versa mark ink in black and then I heat embossed it using clear embossing powder. I created a mask for the bloom so that I could stamp the leaves behind the flower. Once I was done stamping I went back in with Karin markers to add deeper color. The colors I used are: Lipstick Red, Gold, Curry, Olive Green, Sapphire Blue, and Indigo Blue.

I then chose a sentiment from the set and heat embossed it on black card stock using white embossing power. I die cut the panel and adhered it to an A2 sized card base. To complete the card I added a few gemstones for added embellishment. I hope you enjoyed learning about this bright and bold technique today.

Supplies Used:

  • Stamps: Bloom and Grow
  • Paper: Stathmore Watercolor Cardstock
  • Coloring Medium: Karin Markers – Lipstick Red, Gold, Curry, Olive Green, Sapphire Blue, and Indigo Blue
  • Stampin Up Ink Pads: Pink Passion, Bermuda Bay, Rich Razzleberry, Blue Bayou, Brilliant Blue, and Summer Sun

Thank you for stopping by today! Have a wonderful Friday and weekend!

Crafty Hugs,

Natasha

Sending Sunshine and Warm Hugs

Happy Sunday crafty friends! I hope you are having a good day! I have been enjoying watercoloring over the last couple of days and truly enjoyed working with Statement Flowers. I recently became a DT member at Crafty Meraki and my teammates have continued to inspire me with their talent. I placed an order recently at Crafty Meraki and was so impressed with the items in their shop, kind service, and SUPER fast shipping! I hope you will check it out!

I started by stamping Statement Flowers using WOW embossing ink on Canson XL Watercolor Card stock. I used a gold embossing powder for my image. I started by taping down my image to a board and couldn’t wait to water color. I used 2 different mediums, Gansai Tambi water colors and Peerless water colors. My first layer of color was made using Gansai Tambi. I used a wet on wet technique to color. I let layer 1 dry over night. The next day it was so nice out here, I decided to watercolor on my deck! It was so relaxing! I decided to add more layers using my Peerless water colors. I love intense color, so I opted to use these! I used a variety of shades until my coloring was complete on my floral image! I used shades of red, pink, purple, and blue in each floral. On the leaves I used green, blue, and yellow.

Once the floral was complete I felt I needed a background around the image. Unfortunately this didn’t go as planned. I wanted a dark gray around my image…. I don’t think I did the best job cleaning my brush last time…. it came out purple! So I had to go with it! I ended up liking it, adding shades of purple and some dark gray around sections. In the end, my accident turned out ok! Hope you think so too!

I chose 2 sentiments from the set and heat embossed both using a white powder on black card stock. I mounted the A2 panel onto a gray card base and foam mounted each sentiment. I added a few clear sequins for added sparkle!

Supplies Used:

  • Stamps: Statement Flowers – Altenew
  • Coloring Medium: Gansai Tambi Water Colors, Peerless Water Colors
  • Paper: Canson XL Watercolor Card Stock
  • Other: Sequins

I hope you will stop by Crafty Meraki to see their shop and to visit the blog (so much BEAUTIFUL inspiration)

Have a great rest of your Sunday!

Crafty Hugs,

Natasha